Dual Twister Ramp + (Design)

2 12 2012

This is the last design of a DTR.  I add 3 levels between the floor and ceiling. This levels are interconnected with this two ramps.

Rampa003

This is the video of the last design of the Twister Dual Ramp +:

This is a render:

Rampa013w

This is template in PDO format : Rampa06x.pdo (Zip file)

Rampa014

This is PDF version file:

Rampa013


Hello Kitty (Design)

28 11 2010

This is the design of Hello Kitty 3D (Metasequoia) based on 2D drawing below:

The next picture is a render from Metasequoia:

The following video shows the various parts and angles of 3D design:

Now it’s time to create design based on Metasequoia, the templates for the papercraft model from Pepakura.

This is the template of Hello Kitty from Pepakura Model (29 cm high) in PDF format (Includes Black & Color versions):

This is the original file in pdo (Pepakura): Hello Kitty.pdo (ZIP file)

The following video shows the location of each piece in relation to the 3D model, seen in Pepakura:

Well, the next step is to print, cut, fold and glue to create the papercraft model …

See post: Hello Kitty (Model)


Dual Twister Ramp (Model)

25 11 2010

From post: Dual Twister Ramp (Design)

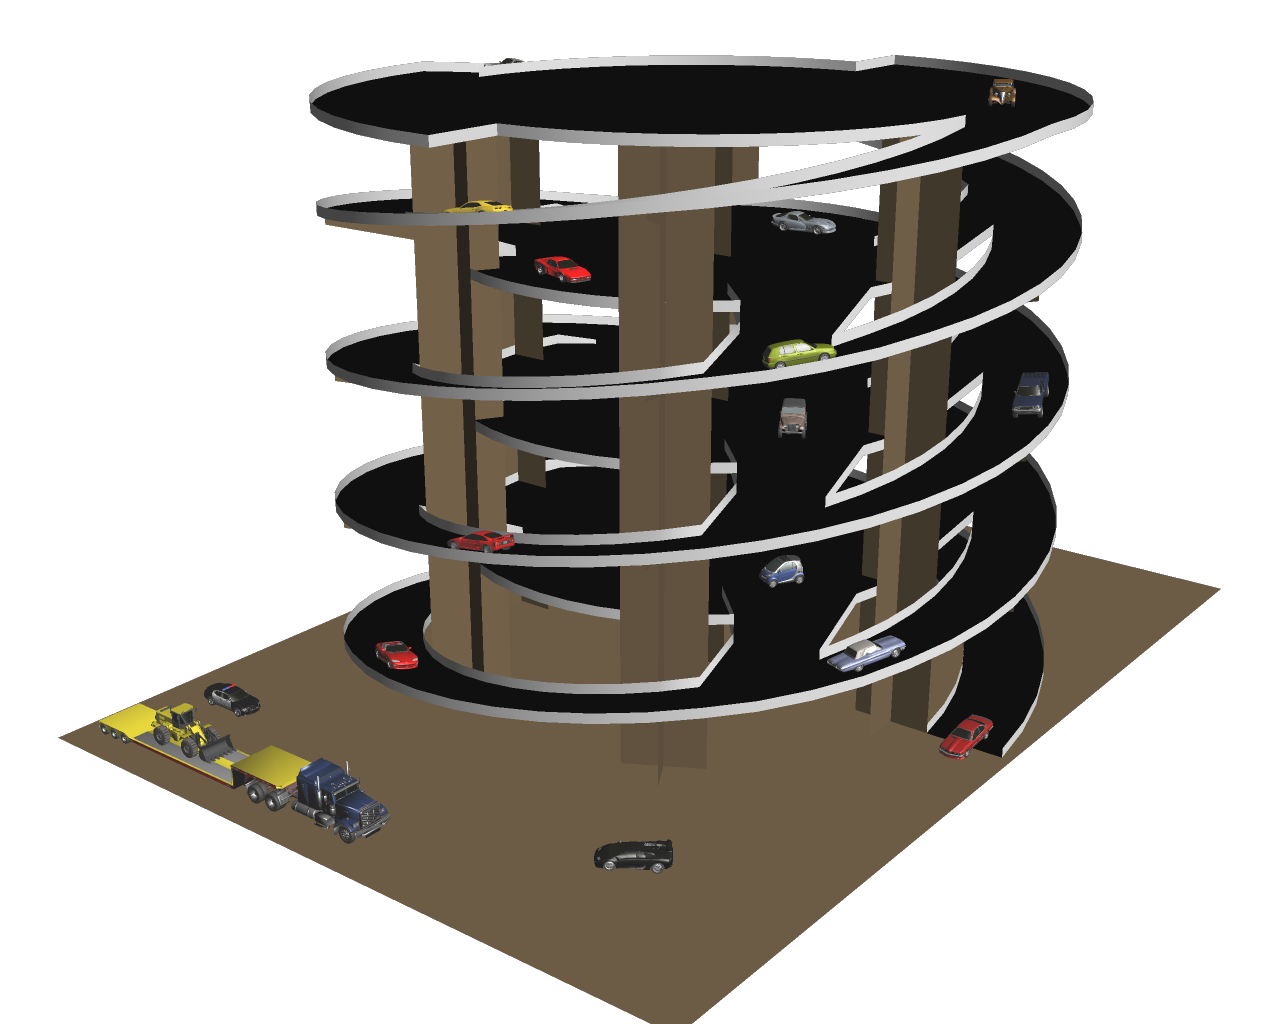
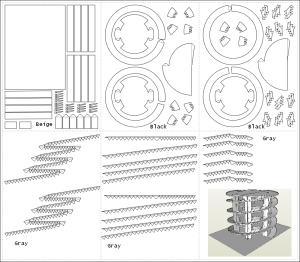
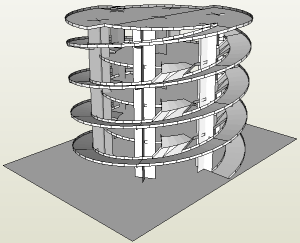
Based on the final design of the Dual Twister Ramp (DTR), held in Metasequoia, make a template (Pepakura) to build a scale model of the ramp (10cm high).

This is template in pdf forma (Black and Color)t:

This is the format version PDO: Rampa005x.pdo (Zip file)

The following video shows how they were attached to different parts of the scale model of the DTR:

These are photographs of the scale model of the DTR finish:


The following video shows the scale model of the DTR in action, with two mini balls (balls of paper) running down the ramps in various ways. For the same ramp and separate ramps.

Ok, the next step … create the real scale model of the DTR (59 cm high).

To be continued…


Lego Man (Design)

22 11 2010

I like the Lego toys, so I decided to make a model in Metasequoia.

My young son asked me to have a helmet.

This is a render picture:

But the 3D model was not enough, it’s time to make templates in Pepakura to give volume to the design.

This is the face template:

This is the template in PDF format:

This is the format version PDO: LM.rar (Rar file)

This video is an exploration of design from Metasequoia:

See porst: Lego Man (Model)


Balance – To appreciate the weight of air

22 08 2010

Does air have weight? Of course it is!

This is a balance that I designed to appreciate the weight of air. The experiment was demonstrated by my 5 year old son at his school.

This is the design of the balance, using Metasequoia:

These are pictures of some renders:

In the following video you can see the design structure of the balance:

This is the template in PDF format:

This is the format version PDO: Balance01.pdo (Zip file)

Mirror: Balance01.pdo (Zip file)

The following video is to identify each part of the balance in the design template. We must pay attention to the red boxes that appear when selected each element of the 3D design.

Hands On!

First start with the base, adding a counterweight with several coins of 25 cents Quetzal (6 * 8 = 48 coins), about $ 1.50 USD. With cardboard circles and strips of cardboard wrapped and sealed with adhesive paper, make sure the main mast.

More and more strips of cardboard rolled form individual carriers to ensure the spin axis and the counterweight of the indicator and the arms of the balance.

In closing, the brackets are placed hooks made of paper clips.

Ready, the balance is complete!

It’s time to experiment!

First common place two balloons of equal size, one on each hook of the balance.

One can see that the arms remain horizontal balance.

It is filled with either air balloons and notes that now the balance arm that holds the balloon filled with air is lower than the side of the globe which has no air.


Meka (Papercraft) from Metasequoia

17 08 2010

This model is one of the examples that come with editing software Metasequoia 3D.

One render picture:

I took the liberty of making the template design to go on paper, using the program Pepakura.

This is the template in pdf:

If you prefer there is also the version pdo (It is lighter), which can be viewed through Pepakura: Meka.pdo (zip file)

The video below show the way they stuck the pieces of the robot:

More pictures….